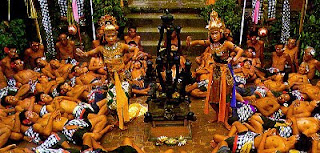
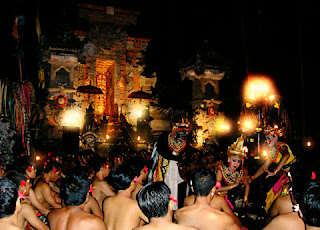
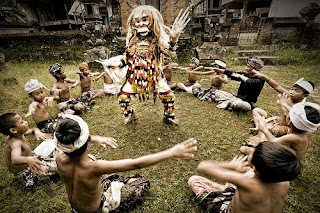
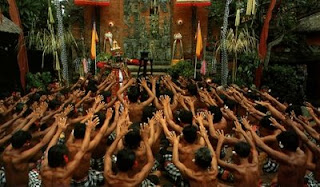
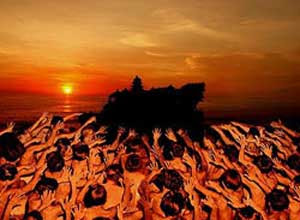
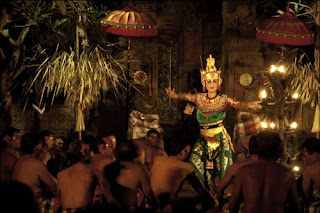
As Madam Lydia said, She wanted to know more about the background song of our blog. From me, it is Kecak Song from Bali. Actually, this is a form of Balinese music drama, originated in the 1930s and is performed primarily by men, although a few women's kecak groups exist as of 2006.
Also known as the Ramayana Monkey Chant, the piece, performed by a circle of 100 or more performers wearing checked cloth around their waists, percussively chanting "cak" and throwing up their arms, depicts a battle from the Ramayana where the monkey-like Vanarahelped Prince Rama fight the evil King Ravana. However, Kecak has roots in Sanghyang, a trance-inducing exorcism dance.
These are some photos when Kecak Dance performed at Bali.
Monday, December 20, 2010
Wednesday, November 17, 2010
Final Output - E-Wallpaper Project - Indonesian Traditional Dance Festival
YEAA!! I finally completed this assignment. Hope I will get good marks for this. Thx to Madam Lydia who had given me advices.
FLATTEN IMAGE
Madam Lydia want us to flatten the .psd file. Bellow are the step by step process on how to flatten image.
Here is the file with so many layers in it.
Right Click > Flatten Image (click on the name of layer)
Voila!! now all the layers are merged in one.
Named it to Indonesian Traditional Dance Festival.
weeeeeeeeeeeeeee~
Masking and Finishing
Hello Folks, finally we've reached the last step of doing an E-Wallpaper Project. For now I'm using images from http://www.shutterstock.com/ for decoration.
this kind of image that I'm gonna use.
First, surround the object with Pen Tool.
Right Click > Make Selection
Input 0 for Feather Radius.
Look, now the object already selected.
Move the object to the working canvas.
Alt + Click the active layer to hidden all the layers except it.
Select > Color Range
then select the color of the object to select just that color and separate it from d background.
input 100 for Fuzziness
Now the object separate with the background already.
Press Alt+Del to fill the object with black color. Press it many times until the object filled with a solid black.
Add Layer Mask to that layer
Use Eraser Tool with white foreground color to erase some of untidy part of the object.
Look, some part is missing.
To heal the object (if you're wrongly erased it), still use Eraser Tool but change the foreground color into black. And make sure you are activating the Layer Mask.
Give the object some effects with Blending Options.
Drop Shadow effect to give the object Depth Of Field. Input all these number of value.
Inner Glow, to glow the some part of the object.
Bevel and Emboss to give 3D feel.
And Contour, to smoothing the 3Dness of the object.
Activate the background layer, then you will see this kind of look.
Do the same to another object and arrange it.
This is similar to the previous object, but for this I'm gonna put a Batik pattern on it, to give traditional feel.
Open the batik pattern (image courtesy by google.com)
put it above to the object layer.
Right Click > Create Clipping Mask, to the batik layer.
Look, now the batik pattern Masking into the object already.
Then, adjust the color correction and give some effects. (Blending Option)
Blend all the objects and arrange nicely.
Give a Title.
Masking the title with batik pattern also to give more traditional feel.
Finishing, give information text, sponsor, gallery, etc. and also give them some effects to avoid the Wallpaper become flat.
Okay Folks, that's all how I finishing my E-Wallpaper, just using basic tool and simple way but of course not really bad product (I think :P).
Give some comments bellow if any complain or something is not clear for you, I will try to explain more. Please give me feedback about how I explain this kind of things. It'll really help me to improve my blogging skill afterward.
Well, bye for now!
Sunday, October 31, 2010
Retouch Photo
Now, time to retouch the objects.
I've already cropped the other dancer images and arranged them
To retouch image, each person has different style. Some people often to use Brightness and Contrast to adjust the lighting, some people use Level, and maybe the others use Curve or etc. It depends what is feel that we want to put into that image.
In this case, I'm gonna put a kind of elegance feel to the dancer images.
First, duplicate all the dancer-cropped layer.
then, change front layer style to "Hard Light"
Now the contrast of the image is more strong than before, it gives attraction to people at the first glance.
Do the same step to the others.
Then, I'm gonna put a 'depth' between the object.
Blur the dancer at the back. Give the more blur for the very back dancer.
Adjust the Level, Curve, Color Balance, or etc. (Image > Adjustment)
Then, adjust the Vibrance (Image > Adjustment) to reduce the color strength.
Well, this is the way that I always use to retouch images that separately before.
Hope, it's help you to know the Photoshop tools more. Bye for now.
Subscribe to:
Posts (Atom)