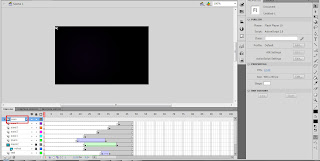
Since Flash is one of family of Adobe product. So, it officially able to import .psd and .ai file.
Well, the steps are...
File > Import to Stage... or press CTRL + R
Choose any Adobe Product file, mine is .ai
Just press OK to continue import all the layer inside
Look, now your stage filled by objects that have created in .ai.
It import all the layer and even the layer's name.
Well, that's all that I've learned in Tutorial 3
Bye for now.
Friday, April 1, 2011
Tutorial 2
Well, today we learned about 'LINK'
I thought Adobe Flash is only can create the moving object, in fact it has great tool and script to do another things related to website design. For example LINK
I thought Adobe Flash is only can create the moving object, in fact it has great tool and script to do another things related to website design. For example LINK
Thursday, March 3, 2011
Tutorial 1
First Tutorial!!
In class we learned about Layer and Timeline.
Look at the picture below.
There are some parts that we need to know first before we start.
Layer : the function is just same like in the others Adobe software, we can separate the object by this tool.
Timeline : Where we put frames or keyframes to animate object.
Okay, for the first tutorial Madam Lydia ask us to do simple animation.
Let's start
Open Adobe Flash > Choose Action Script 2.0 (I usually use this version)
then the screen will be appear like this.
change the dimension of stage to 400 (Width) X 250 (Height) pixels. and Frame rate: 12.00
I have already created the background for this project in Photoshop.
So, let's just import it to the stage.
and select the background.jpg file
Give layer name 'background'
Click to 48th frame in timeline
and Press F5 (insert frame)
Import another object which is 'branch.png' that i've created in Adobe Photoshop. I am going to make it as a masking object.
Make another layer and name it as 'mask'. Make an black circle object without outline using Oval Tool (O) at the corner of stage.
Right click to 'mask' layer and select Mask. It will mask the layer below it which is 'branch' layer.
Unlock the 'mask' layer and insert keyframe at frame 31 or press (F6). At the frame 31 enlarge the black circle until it covers up the branch.
Right click at any frame between the first keyframe and frame 31, click Create Shape Tween. It makes the the black circle able to change the shape into the another shape in last keyframe.
and Lock the 'mask' layer. Now you can see how the 'mask' works to the layer below it.
Make a new layer, name it as 'text'
Import the details of the event to the stage and arrange nicely.
(put at frame 32)
Right Click > Convert to Symbol
named it as 'Text Symbol'
select 'Movie Clip'
Change the style of color effect in Properties into 'Alpha', and give 0%
Insert Keyframe at frame 36
Now change the value of Alpha into 100%
Right Click > Create Classic Tween
See how the 'Alpha' channel works in combine to 'Classic Tween'
Make another masking object (same step with branch.png)
Using Notes.png
Do not forget to lock it again
Import 'piano.png', place it at frame 19
Make another keyframe at frame 34
and place it based on picture above
Give a Classic Tween
Select any frame inside the tween and change 'Ease' value.
It gives smothness in tween-ing the object.
Import 'saxo.png' and place them like the picture above.
Also give different size and rotation to make it more dynamic.
Group and name it as Saxo
Import 'mraz.png' and place it based on picture above.
Give another keyframe and now place into the stage.
Create Classic Tween and change the 'Ease' value into 100
Now you can play and save it as SplashScreen.swf
Okay, that's all for tutorial 1. I hope you can follow this tutorial smoothly.
Any question just leave comment below
Well, thank you.. Bye for now :D
New Semester [Adobe Flash]
Yay, new semester!
I got tutorial class with Madam Lydia again, means I have to update this blog furthermore.
We've already learned about Photoshop last semester, then for this semester we are going to learn Adobe Flash.
Actually, I have learned a bit before, only the basic. I cannot wait to animate the object that I created by myself. Hope this semester will be more fun than last semester.
Bye~
Monday, December 20, 2010
Kecak Song
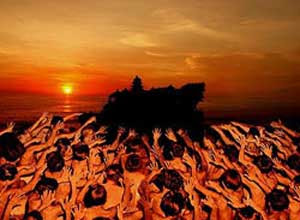
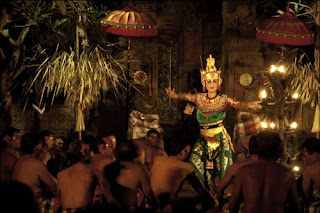
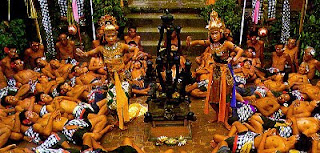
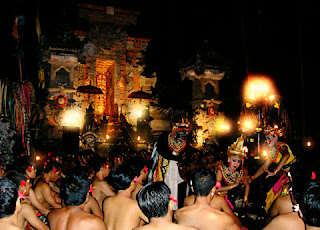
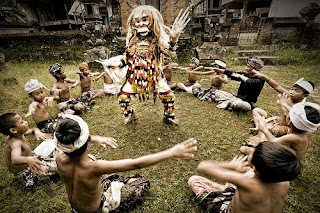
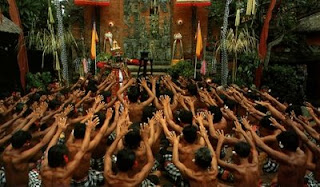
As Madam Lydia said, She wanted to know more about the background song of our blog. From me, it is Kecak Song from Bali. Actually, this is a form of Balinese music drama, originated in the 1930s and is performed primarily by men, although a few women's kecak groups exist as of 2006.
Also known as the Ramayana Monkey Chant, the piece, performed by a circle of 100 or more performers wearing checked cloth around their waists, percussively chanting "cak" and throwing up their arms, depicts a battle from the Ramayana where the monkey-like Vanarahelped Prince Rama fight the evil King Ravana. However, Kecak has roots in Sanghyang, a trance-inducing exorcism dance.
These are some photos when Kecak Dance performed at Bali.


Wednesday, November 17, 2010
Final Output - E-Wallpaper Project - Indonesian Traditional Dance Festival
YEAA!! I finally completed this assignment. Hope I will get good marks for this. Thx to Madam Lydia who had given me advices.
FLATTEN IMAGE
Madam Lydia want us to flatten the .psd file. Bellow are the step by step process on how to flatten image.
Here is the file with so many layers in it.
Right Click > Flatten Image (click on the name of layer)
Voila!! now all the layers are merged in one.
Named it to Indonesian Traditional Dance Festival.
weeeeeeeeeeeeeee~
Subscribe to:
Comments (Atom)


